Plumbers...
-
- Posts: 0
- Joined: Thu Apr 05, 2018 10:09 pm
Plumbers...
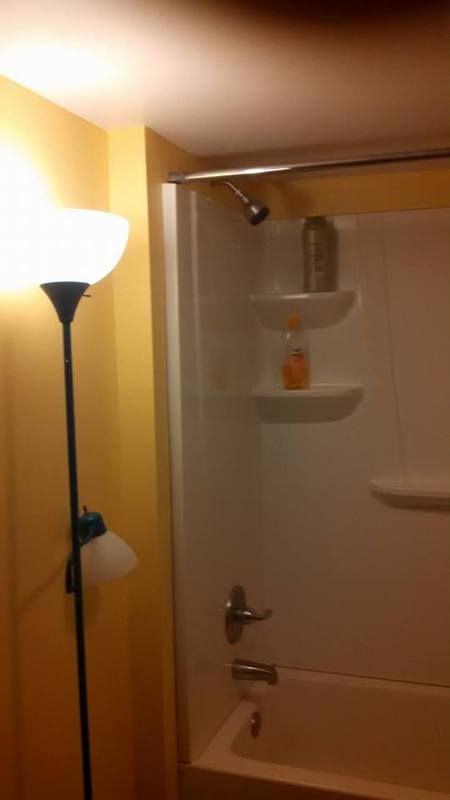
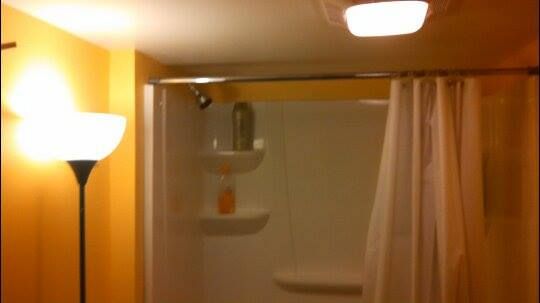
We've talked plumbing before.... anyhow, I tore out my bathroom.
Took out floor & joist (was standing on dirt).
Took out ceiling (blown in insulation and all).
Stripped walls to studs...
Tore it ALL out.
Put in new joist, subfloor, backerboard, framed in ceiling, added new light/fan and duct work, new insulation.
put in new 4 pc tub, new faucet, new drain line.
New electrical, plugs, switches.
New sheet rock on walls & ceiling (2 vapor barriers in ceiling).
Putty, sanded, painted....
Done it all myself, with a little help from my 3 sons, as they could spare a moment (which wasn't much, since they have their own families)...
Still have the other side of the batroom to finish - but 3/4ths is done now.
So far, about $3,500 invested vs $10-15K to a contractor (or more).
Still more to do, but it's taking shape.
T.
-
- Posts: 0
- Joined: Sat Mar 31, 2018 11:57 am
Plumbers...
Nice.
How long did it take you?
-
- Posts: 0
- Joined: Sat Mar 31, 2018 11:58 am
Plumbers...
Looks great.
I presume the torchiere light is just for while you are working and not part of the finished plan.
-
- Posts: 0
- Joined: Sat Mar 31, 2018 11:59 am
Plumbers...
Nice, it sounds like you did a LOT of work.
After all of my construction a few years ago I still have an unopened outside mount Fantech exhaust fan that I intended to install under my porch to ventilate the basement bathroom. I ended up using a Fantech inline fan instead. The whole idea of the Fantech line is that they're very quiet and remotely mounted instead of noisy and in the bathroom ceiling.
In case anybody's interested in it, it's a PBW 110 which mounts outside on the wall and you run a duct to it.
-
- Posts: 0
- Joined: Thu Apr 05, 2018 10:09 pm
Plumbers...
Quote from: timothy42b on Mar 28, 2017, 12:59PMNice.
How long did it take you?
Thanks.
Been "piddling" at it, for a about 6 weeks (on Sat's and afternoons a few hours a day).
Main objective took 3 days - tear out everything, and get it dried back in (I was standing on dirt, after we took out the flooring and joist). From there, the main rush was getting the tub in (another 2 days), and after that I just piddled (electrical, framing, insulation, sheet rock, bunch of little stuff). I hate sheetrock & painting.
Quote from: robcat2075 on Mar 28, 2017, 01:28PMLooks great.
I presume the torchiere light is just for while you are working and not part of the finished plan.
Thanks.
And that would be correct!
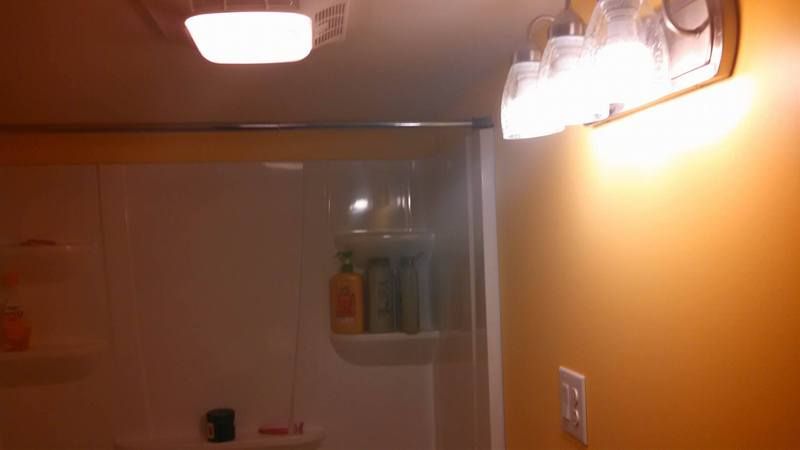
It was replace by a new sink light (installed last night):
I'll be adding a new adjustable (double) Shower curtain rod a little later on:
https://www.lowes.com/pd/Moen-60-in-Brushed-Nickel-Curved-Adjustable-Double-Shower-Curtain-Rod/50171027
I had considered putting a shower door on, but they cost as much as the whole tub did (and I don't like to looks of a door)
-
- Posts: 0
- Joined: Thu Apr 05, 2018 10:09 pm
Plumbers...
Quote from: Doug Elliott on Mar 28, 2017, 11:30PMNice, it sounds like you did a LOT of work.
After all of my construction a few years ago I still have an unopened outside mount Fantech exhaust fan that I intended to install under my porch to ventilate the basement bathroom. I ended up using a Fantech inline fan instead. The whole idea of the Fantech line is that they're very quiet and remotely mounted instead of noisy and in the bathroom ceiling.
In case anybody's interested in it, it's a PBW 110 which mounts outside on the wall and you run a duct to it.
It was a lot of work, for sure.
The fan/light I went with, was similar to this one:
https://www.lowes.com/pd/Broan-0-3-Sone-110-CFM-White-Bathroom-Fan-with-Light-ENERGY-STAR/4311820
and it's pretty quiet.
The original fan did not work well, and I found out why.
The previous owner of the house, didn't run any duct work. It was vented into the attic space.
Then apparently later, they had insulation blew in on top of it.... duhhh, real smart.
So of course when I took the ceiling out, we had a floor full of blown in insulation to dispose of, then I had to totally reframe the ceiling. I put up 2 vapor barriers in the ceiling (1 on top before I framed it up, and one on bottom after I framed it up and then covered with sheet rock - a little over kill maybe).
To run the duct work, was a little challenging. To get outside with the venting, I would have to go out the metal roof, or bring the duct down inside the framing of the back wall to exit out the side of the house.
I had to think outside the box, so.... I ran the duct from the light/fan to the back/exterior wall, then came inside the wall with a diverter box (for a dryer!) - and it worked like a charm, and I went out the back wall with the vent. Check this out:
https://www.lowes.com/pd/IMPERIAL-24-in-to-45-in-Adjustable-Periscope-Dryer-Vent/4753386
The one I used was actually a little thinker.
Then I exited with this louvered vent: https://www.lowes.com/pd/Builders-Edge-4-in-Plastic-Louvered-Dryer-Vent-Cap/3819157
And capped it with this guard: https://www.lowes.com/pd/Lambro-4-in-Plastic-Pest-Guard-Dryer-Vent-Cap/4566308
Kinda funny how dryer venting parts, works so well as exhaust fan venting parts.
Then I covered all that up, with 3 layers of insulation overhead, and new insulation inside the exterior wall.
Yea, it's been a VERY involved project...
T.
-
- Posts: 0
- Joined: Sat Mar 31, 2018 11:59 am
Plumbers...
Very nicely done! Sometimes it's nice to be a "do-it-yourselfer" to save yourself some money, provided you know what you are doing, which you do.
-
- Posts: 0
- Joined: Thu Apr 05, 2018 10:09 pm
Plumbers...
Quote from: crazytrombonist505 on Mar 29, 2017, 06:04AMVery nicely done! Sometimes it's nice to be a "do-it-yourselfer" to save yourself some money, provided you know what you are doing, which you do.
Thanks.
I'm just too particular, so it takes me a while (that's the downside), but I know its done right.
One thing about it - electrical, I did it the way I wanted it. I moved my light switches and plugs up higher on the walls. With 2 grandsons, It helps keep them a little safer (and I don't have to bend over so far to plug something in )
The subfloor... I used Advan Tech. My nephew had a short pc left over from a build, that had been laying outside for 2 years in the weather. It still looks new! So I bought some, then put backer board on top of it. I sealed the bottom of the wall where it meets the backer board - and then painted 3 coats of water proof sealant over it. I'll be using Vinyl Plank flooring, with a waterproof membrane under it as well (over kill, yea), and it'll be water tight. The Vinyl Plank Flooring looks, and feels like hardwood, and is easy clean up and very tough/scratch resistant.
The drywall, is the purple stuff - mold and water resistant. Only problem, it took 4 coats of paint to get it covered!
T.
-
- Posts: 0
- Joined: Sat Mar 31, 2018 11:57 am
Plumbers...
Six weeks? That's not long for a home project. I've seen people take a year at something like this, and not do as well as you did.
-
- Posts: 0
- Joined: Sat Mar 31, 2018 11:58 am
Plumbers...
It looks great!
-
- Posts: 0
- Joined: Thu Apr 05, 2018 10:09 pm
Plumbers...
Quote from: timothy42b on Mar 29, 2017, 07:19AMSix weeks? That's not long for a home project. I've seen people take a year at something like this, and not do as well as you did.
My wife seems to think I should have been done 2 weeks ago.
I still have the other side to do (toilet area), then put flooring down, and set sink.
And add trim, towel rack, shelf...
Quote from: harrison.t.reed on Mar 29, 2017, 08:14AMIt looks great!
Thanks!
My wife seems to think I should have been done 2 weeks ago.
I still have the other side to do (toilet area), then put flooring down, and set sink.
And add trim, towel rack, shelf...
Quote from: harrison.t.reed on Mar 29, 2017, 08:14AMIt looks great!
Thanks!
-
- Posts: 0
- Joined: Sat Mar 31, 2018 11:58 am
Plumbers...
That looks good, Troy; real nice job. Not bad for a bone playin' duck hunter
-
- Posts: 0
- Joined: Thu Apr 05, 2018 10:09 pm
Plumbers...
Quote from: Orffbone on Mar 29, 2017, 09:32AMThat looks good, Troy; real nice job. Not bad for a bone playin' duck hunter
Thanks David.
It used to be my day time job, years ago.
Now I'm a professional jack of all trades, and master of none.
T.
Thanks David.
It used to be my day time job, years ago.
Now I'm a professional jack of all trades, and master of none.
T.